By Jason Rackley
Location: Oregon, Clackamas drainage.
Class: Technical class IV at medium flows. Pushy, consequential class V- freight train at high water.
Gradient: 201 fpm, continuous
Length: 3.1 miles
Nature: A mini-expedition right in our back yard.
Character: A hidden gem in the Clackamas drainage. Pristine mountain stream flowing through a breathtaking de facto Wilderness canyon.
First, there have been rumors of wood in the river, which is less of a concern as the river has cleaned up considerably in recent years. However, there are still some logs to portage so stay on your toes and always scout what you can't see.
The second challenge is access. The shuttle is devilishly complex, and without local knowledge you will almost certainly get lost. I provide some 'local knowledge' at the end of this report to maximize your chances of success on the infamous Roaring River shuttle. In fact, the first time we tried to run this river in 2001, we got very lost, resulting in the original roaring river trip report on this site. Since then Pete has completely dialed the shuttle and we now run this section several times a year.
Third is flows. Most people don't know how to tell when this river is going, but I clear that up as well at the end of this report.
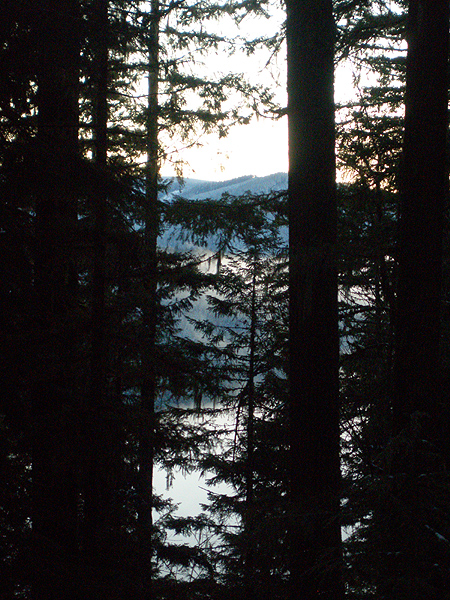
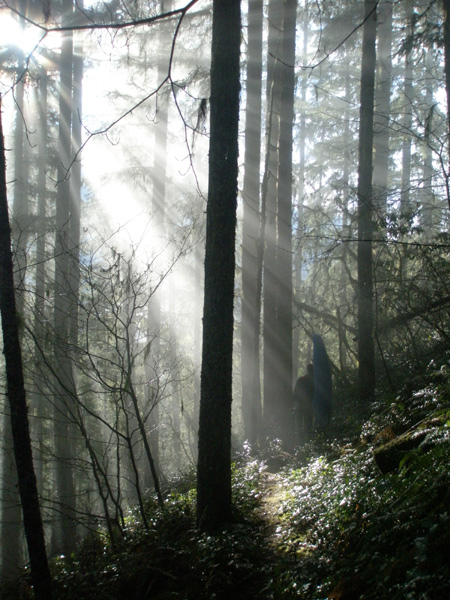
Roaring River Canyon is spectacular; this de facto wilderness area is a popular hiking destination, and has been something of an open secret in the Portland Kayaking community for years. The canyon is very wild, and even though it hasn't been 'officially' declared a Wilderness area, it is treated as such by the Forest Service in every way. We are very lucky to have such a place so close to Portland. In the Summer and Fall when the river is low I highly recommend taking the short hike up from the river-left campground at the take out. About a mile upstream of the campground is an very impressive stand of old growth timber that is well worth the hike!
Every run down this river feels like a little expedition, as the road is somewhat epic and you have to hike a mile down into the canyon to reach the river. Once on the water the action is fast and furious, with many long, high-quality boulder gardens to keep you entertained. In spite of this, Roaring is constantly overlooked by paddlers zooming up to run the Clackamas or other rivers in the area.
Looking down into Roaring River Canyon during the shuttle.
When you arrive at the end of the road shoulder your boats for the 1.5 mile hike down to the river. The weather is usually cool when the river is running, which makes for easy hiking. On the way down to the river you get some amazing panoramas of this spectacular river canyon.
Pete takes a breather and enjoys the view during the mile and a half hike down into the canyon.
Below the put-in the river is swift and clean with lots of little class two rapids to get the blood flowing after the hike. Head Knocker is the first big rapid and can be seen from far upstream. This is one of the biggest rapids on the river and usually has some interactive wood; scout on the left before committing to the first half of the rapid.
Pete drops into Head Knocker.
When you scout Head Knocker initially, take note of the limbo logs ( visible far downstream in the photo above ). As soon as you go under those logs, eddy out on the right and scout the bottom half of this rapid for wood. Boat-scouting here is not recommended.
Pete runs the bottom half of Head Knocker. Taken from the scouting rock on the right, halfway down. Note the new log in play. Stay left of that log. Do not boat-scout this rapid.
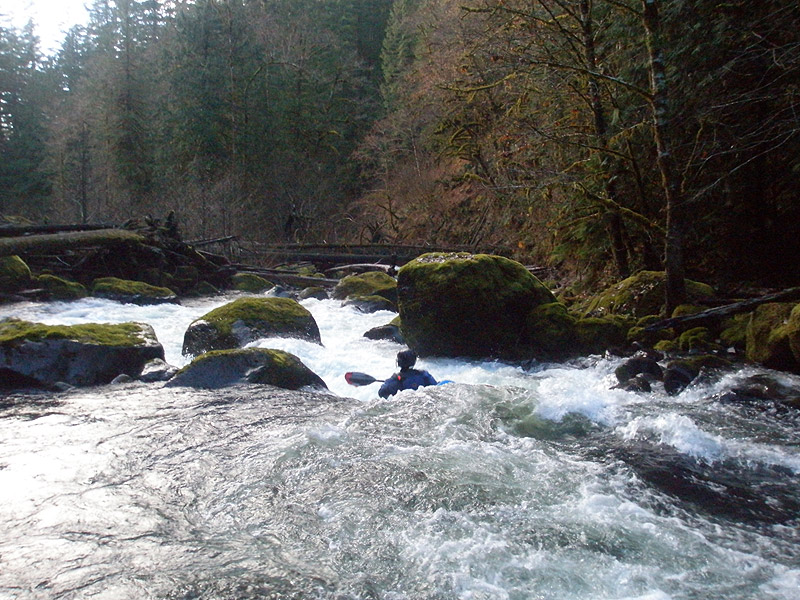
Below Head Knocker the river settles into a smooth rhythm of fun rapids separated by fast-moving smaller rapids. There are almost no pools. At high flows, the river is a freight train!
There are many high-quality drops on this run. Pete runs a typical Roaring River rapid.
A mile or so below Head Knocker be on the lookout for Gabe's Hole. Gabe Flock almost drowned here back on the First Known descent, documented here by Dan Coyle.
Gabe's starts with a slight bend to the left in the river and a slight narrowing of the riverbed. The river accelerates down over a bedrock channel and there is a large old growth log running parallel to the current on the river-left side. This log also guards the entrance to the scouting/portaging eddy on the left. DO NOT MISS THIS EDDY. Just downstream is a large horizon line marking the first of three ledges. At higher flows the move into this eddy is hectic and requires solid class IV skills.
Get out on the left and scout Gabe's. The first ledge is the biggest and least consequential. Keep going, because it is the last hole that Gabe ended up in. This hole is awful. Do not run it without safety! I have only run this bottom drop one time ( at lower flows than Gabe had ), and I barely made it. Ever since then I have portaged, which is easy on the left.
Pete scouts Gabes Hole.
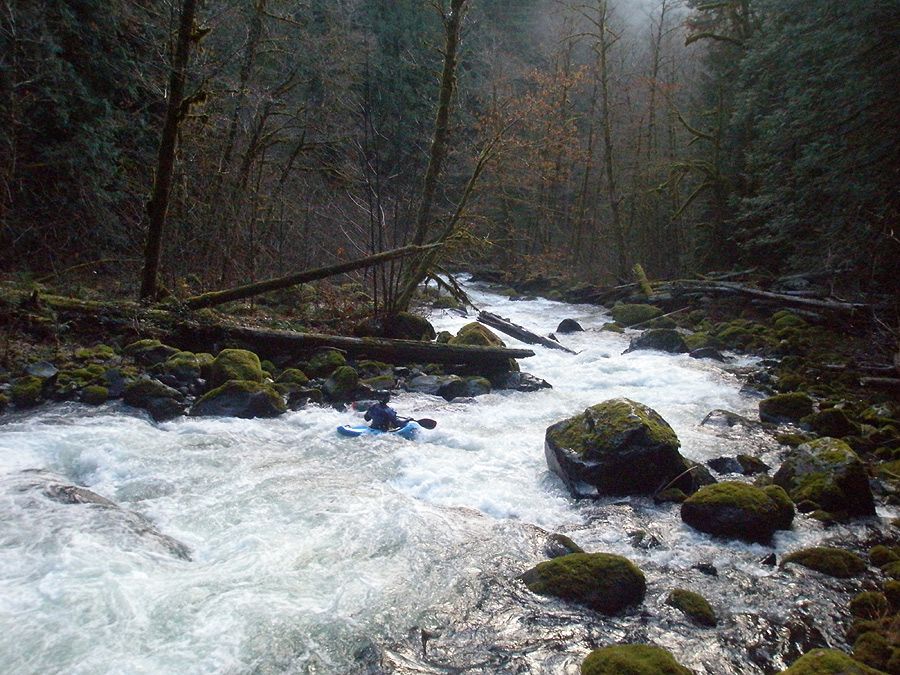
Below Gabe's the river keeps up its steady pace with many fun rapids. The next drop of note is Maple Hole, easily identified by a sharp bend to the right and a horizon line. Eddy out on the left and scout on the large bedrock shelf. Maple is straightforward except at high water, when it get pretty munchy and the runout comes into play. Go right down the middle and punch er' hard!
The author drops into Maple Hole
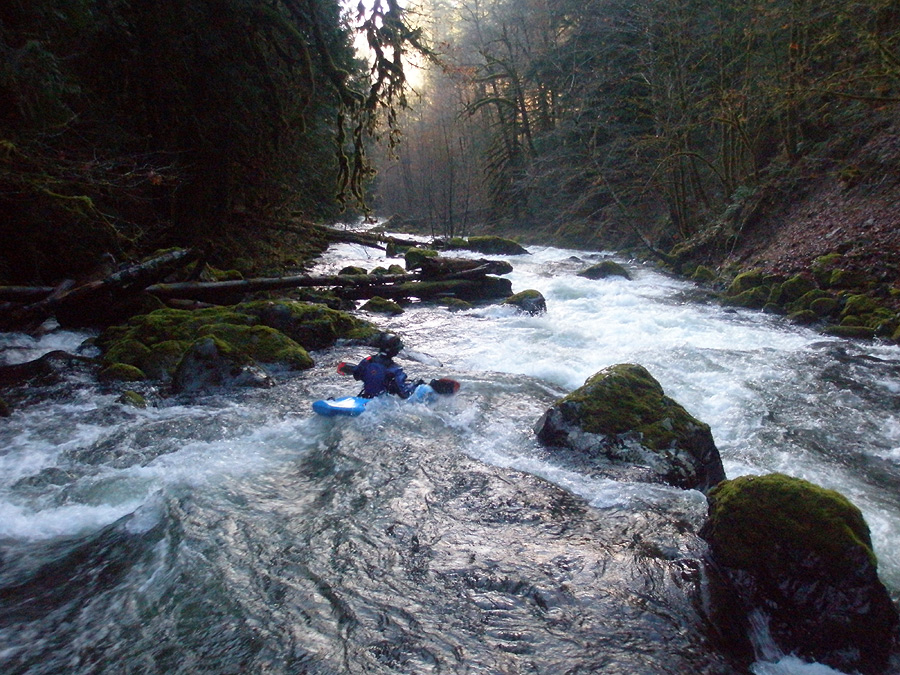
Roaring River ends with a bang. Below Maple is a great series of continuous and entertaining rapids leading up to the take out. The first sizable drop is known as 'Rock Star' and should probably be scouted from the left. Here the river roars over a funky ledge while careening off a big boulder on river-left. Try not to get pasted on the boulder, or stuck in the hole!
Pete runs 'Rock Star', a twisty drop which begins the final series of drops leading up to the take out bridge.
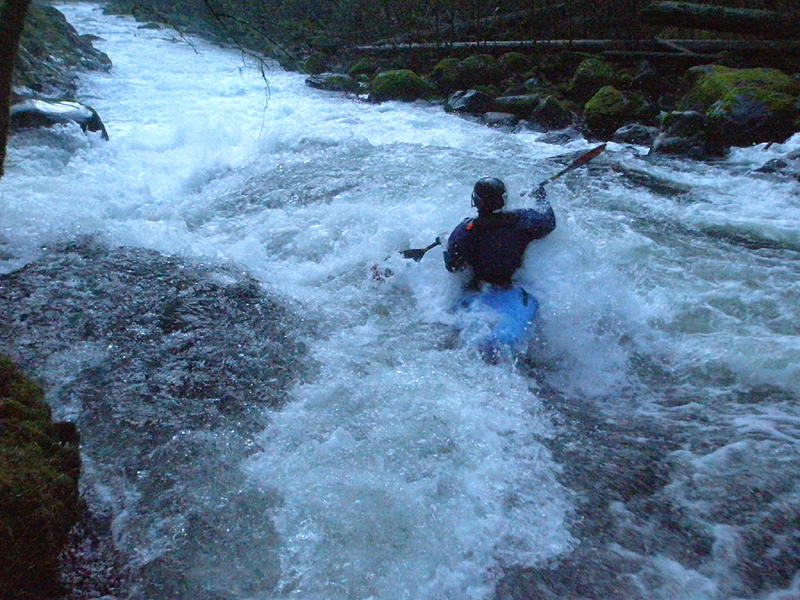
Below the boulder drop the river roars over a series of short but stout ledges that can be scouted from either side of the river prior to putting on. If the river is high it will be worth your while to hike a couple of hundred yards upstream from the take out bridge and decide if you want to deal with these holes or go elsewhere.
Below the ledges the river straightens up and takes one last dash down to the take out bridge and the Clackamas River. Be careful of the hole under the bridge, at high water it gets very sticky, and swims here will likely result in lost gear.
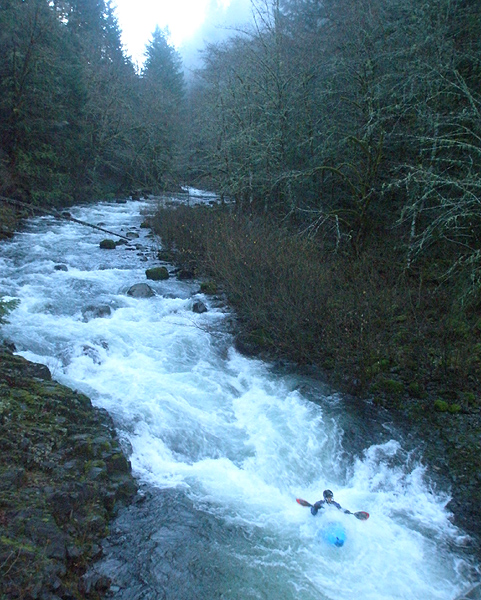
Pete runs the final series of drops, as seen from the take-out bridge.
Nice scenery on the drive out.
FLOWS:
How to get the flows right, from Clackamas local Pete Giordano: Right now I think the best way is to take the gauge at Estacada ( Clackamas at Estacada ) and subtract the gauge at Three Lynx ( Clackamas at Three Lynx ). The difference should be 1500-2000 cfs, which is optimum, but can be done lower or higher depending on whether the Three Lynx gauge is rising or falling, freezing level, or whether it was a hard isolated thunderstorm and the tribs are flashing.
Then look at the take-out level at the bridge and/or hike up the trail that goes along river right from the bridge ( not the old dirt road ) to the stick gauge which is in the last pool before the take-out on river right at the downstream end of the pool ( visible far upstream in the second to last photo on this report looking upriver ). I'd say 2.2 - 2.5 feet on the stick gauge is good first-time level, over 3 feet on the stick gauge is high.
More on flows from Jason: Be careful about putting on this river at high water. It gets brutal. Look at the river beforehand from the take out bridge. The channel upstream should look like the last whitewater photo in this report: In other words, you should be able to see a few boulders in the channel. If all of the boulders are covered and the water is brown, the river will be class V with bad logs, huge death holes, and other nastiness. Also, beware of putting on when everything is coming up fast. It is probably two hours from the take-out to the put in when you count the hike, so if the river is rising you may find yourself at the bottom of the canyon with two bad options: Hike back out because the river is high, or put on and roll the dice.. We rolled the dice once when the river flashed on us and it was a pretty terrifying day that did not end well ( Our harrowing high-water run on Roaring was later written up as the story Divide and Conquer ).
DRIVING DIRECTIONS TO LOWER ROARING
Ok. This shuttle is one of the most complex in Oregon that paddlers regularly attempt. Many paddlers get hopelessly lost their first time, which is why I included these detailed directions.
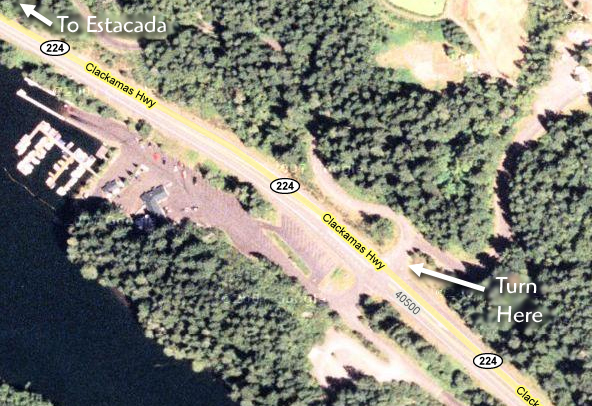
Drive through Estacada. About 6.5 miles after you leave Estacada ( when you come to the bottom of the huge hill ) you will see Promontory Park on the right-hand side of Hwy 224. Turn left at the road directly across the highway from Promontory Park, then turn left again, as shown in the photo below, courtesy of Google Maps.
The turn off Hwy 224, across from Promontory Park. Turn left off 224 then left again.
Check your odometer as soon as you leave 224.
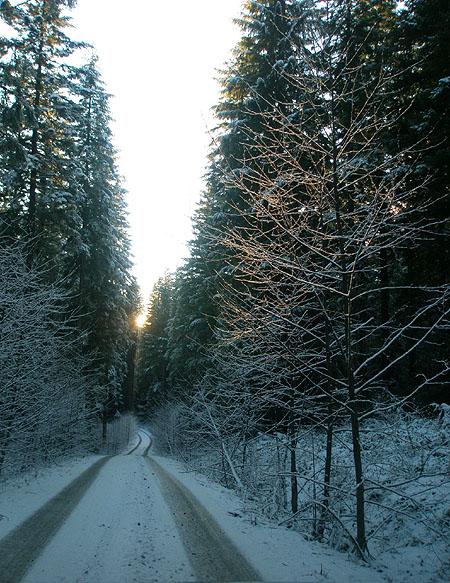
0.0 Miles: Turn off 224 then immediately turn left again. The paved, single lane road should start going steeply uphill. Be careful of oncoming traffic, we almost always see others on the road.
Park your car and continue down what is left of the road. Walk around the big pools of water and mud pits and follow the remains of the road in the same direction you were driving. The road is overgrown but easy to follow.
You will cross a very small creek, and within a couple of hundred yards keep an eye out on the right side ( downhill side ) of the overgrown road for a small, brown, much-abused trailhead sign that is nearly invisible marking a small, narrow trail leading down off the road. Stay on this trail for about 1.5 miles down to the river. This trail is pretty well maintained and hiked pretty often, so you'll know if you are on the right one. It heads straight towards the river, going for a couple hundred yards before it starts dropping through countless switchbacks leading down to the river. Good luck and enjoy this wonderful place!
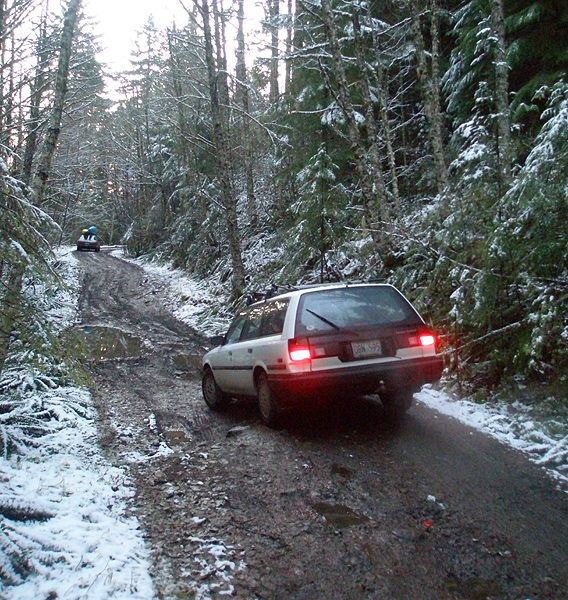
Pete enters the road blowout, which is about a quarter mile above where the road ends.
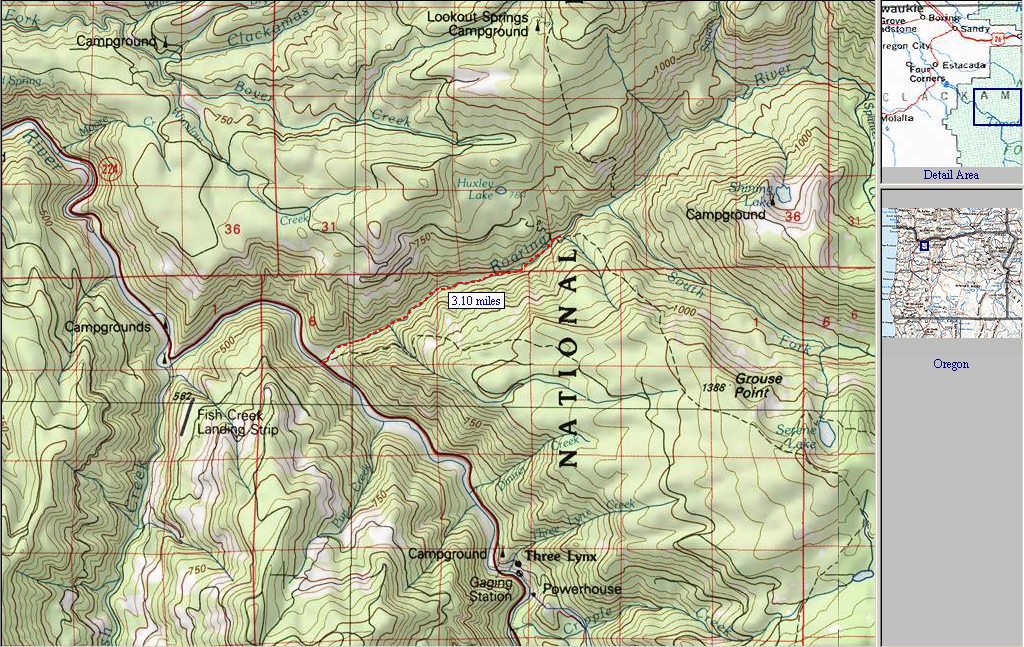
The map to lower Roaring.
For directions to the put-in and take-out, as well as other info, pick up the newest edition of the Oregon paddling bible, 'Soggy Sneakers' by Pete Giordano and the WKCC. This is a book no serious Northwest paddler should be without. You can pick this book up at your local paddling shop, or on amazon.com.
This de facto Wilderness area is breathtakingly beautiful and very popular with hikers in the summer.
This rapid is about a hundred yards long but can be broken into sections if you know where the eddies are. Always scout this drop for wood.
The bottom hydraulic here is 100% terminal and nearly drowned Gabe Flock during the first known descent.
Always scout and make sure there is a rope here if anyone runs it.
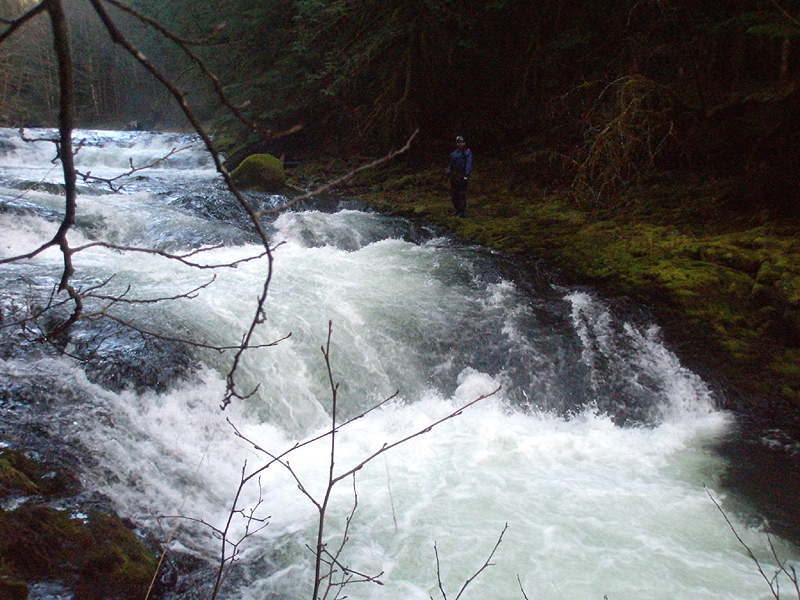
Photo by Pete Giordano
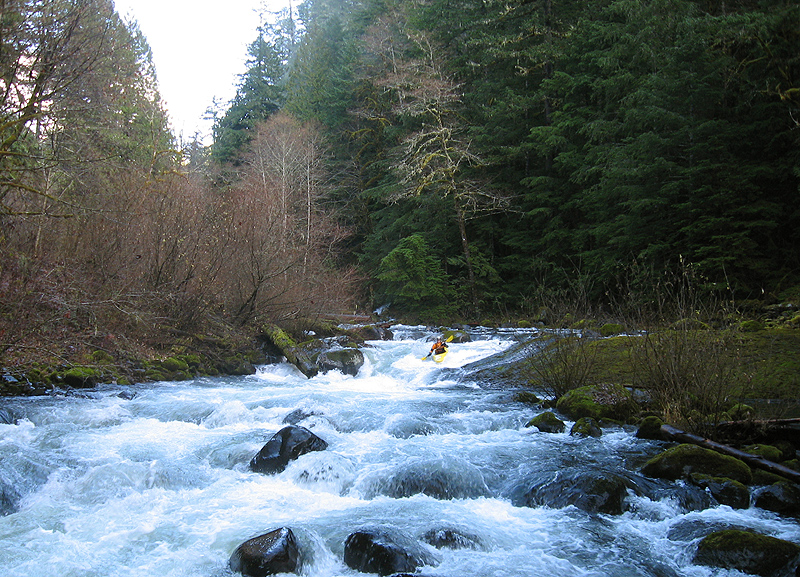
Below Rock Star it is a nearly continuous mad dash to the take out through a three-hundred yard long series of superb rapids.
Be careful of the hole under the bridge, which is not visible here. At high water it packs a wallop!

2.4 Miles: Pavement Ends.
3.3 Miles: Big tree on the left side with a dirt road off to the right, marking the start of the hike to the North Fork Clackamas ( FYI ).
4.3 Miles, bear right ( stay straight ) where the road splits.
7.3 Miles, Road 4610 goes off to the left, go right on 4611. There should be small road signs.
Over the next mile, several dirt roads branch off. Stay on the main road.
8.5 Miles, Stay left at fork. Smaller gravel road goes off uphill on the right, do not take that road.
9.5 Miles, This is where most people screw up. Big 3-way intersection. Stay far right on 4611 ( marked ).
10.7 Miles, Road forks, stay right ( go downhill after turn ).
11.2 Miles, Stay left on main road.
11.4 Miles, Stay right ( straight ) on main road.
11.6 Miles, Stay right ( straight ) on main road.
12.1 Miles, Road quality begins to decline. Big Potholes.
12.5 Miles, Road branches, stay on main road, don't go uphill.
14 Miles ( approximately ) from 224, there will be some huge mud holes and trees marking the end of the drivable section. The road forks into three roads/muddy trails, take the middle one, it may have a sign indicating a trailhead .25 miles away.
This is the toughest section of the shuttle but can be navigated with non-4wd vehicles if you are careful. This photo is looking back towards civilization, with the trailhead to start hiking down into the canyon about a mile behind me, for visual reference.